
Understanding Vapor Barriers
What is a Vapor Barrier?
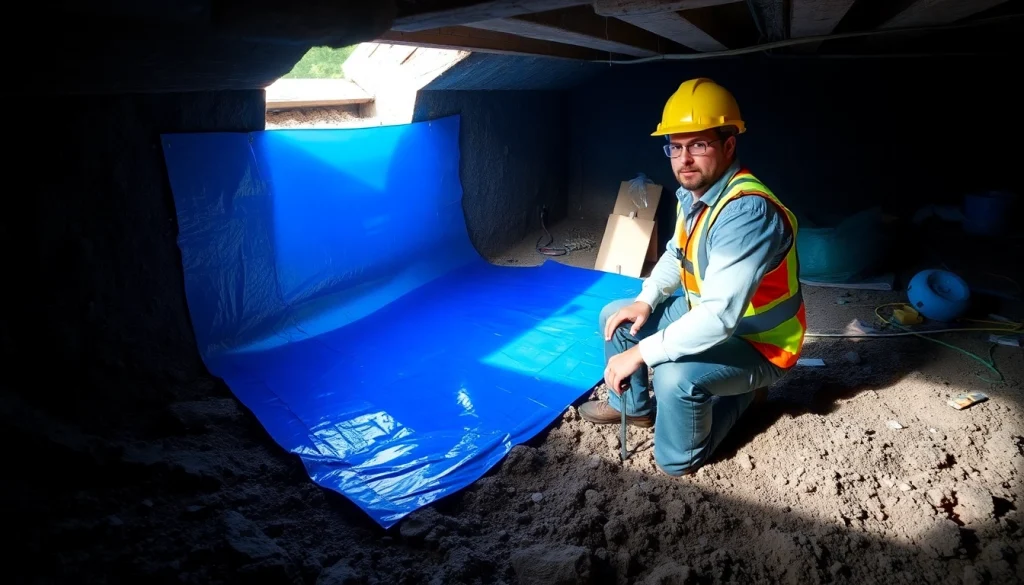
A vapor barrier is a material designed to limit moisture migration from one area to another. It plays a crucial role in home construction, particularly in basements and crawl spaces, by preventing water vapor from entering walls, floors, and ceilings. Typically made from polyethylene plastic sheeting, vapor barriers are essential for controlling humidity levels and maintaining structural integrity.
Importance of Vapor Barrier Installation
Installing a vapor barrier is essential for maintaining a healthy home environment. Excess moisture can lead to mold growth, wood rot, and even structural inefficiencies. Proper Vapor Barrier Installation safeguards your home against these issues by creating a shield against moisture. This is especially important in areas with high humidity levels or where rainfall is frequent.
Common Materials Used
The most commonly used materials for vapor barriers include:
- Polyethylene sheeting: A durable plastic that comes in various thicknesses, commonly ranging from 6 to 20 mil.
- Foil-faced materials: Effectively reflect heat and can also serve as vapor barriers.
- Rubber membranes: Used in specific applications, offering flexibility and durability.
Preparing for Vapor Barrier Installation
Assessing Your Crawl Space
Before you begin the installation process, a thorough assessment of your crawl space is necessary. Inspect for existing moisture damage, signs of mold, and any structural issues. Ensure that the space is clear of debris, and take note of the dimensions to determine how much vapor barrier material you’ll need.
Necessary Tools and Materials
Gathering the right tools and materials is critical for a successful installation. Here’s a checklist:
- Vapor barrier material (plastic sheeting)
- Utility knife
- Measuring tape
- Stapler or adhesive tape
- Ruler or straightedge
- Safety gear (gloves, mask, goggles)
Safety Precautions
Safety should always be a priority during the installation process. Wear appropriate safety gear to protect yourself from dust, mold spores, and sharp edges. Ensure proper ventilation in the crawl space to avoid inhaling any potentially hazardous materials.
Step-by-Step Vapor Barrier Installation Process
Clearing and Cleaning the Space
Start by removing any furniture, debris, or insulation materials from the crawl space. Thoroughly clean the area to ensure a smooth surface for the vapor barrier. This may include sweeping, vacuuming, or even washing surfaces to eliminate any residual mold or dirt.
Measuring and Cutting the Barrier
Measure the dimensions of your crawl space carefully. It’s crucial to cut the vapor barrier to size, allowing for overlaps at seams of at least 12 inches. Use a utility knife for clean cuts, and ensure that the barrier maintains a tight fit against walls and pillars.
Securing the Vapor Barrier
Once you have cut the vapor barrier to size, lay it down in the crawl space starting from one end. Secure it using construction adhesive or a stapler, ensuring it adheres well to the floor and walls. Overlap any seams adequately, sealing them with duct tape for extra protection against moisture infiltration.
Common Mistakes to Avoid
Improper Measurements
One of the most prevalent mistakes is incorrect measuring. Always double-check your dimensions before cutting the vapor barrier. An improperly sized barrier can leave gaps that allow moisture to seep through.
Neglecting Mold Issues
Ensure that existing mold problems are addressed prior to installation. Failure to treat mold can lead to health hazards and undermine the effectiveness of the vapor barrier. Conduct thorough inspections and consider mold remediation if necessary.
Overlooking Sealing Techniques
Securing the vapor barrier properly is crucial for effectiveness. Overlooking sealing techniques, such as using duct tape on seams, can lead to moisture entering your home. Spend time ensuring that all edges and seams are meticulously sealed to prevent any potential leaks.
Maintenance and Long-Term Care
Inspecting Your Vapor Barrier
Regular inspections of your vapor barrier are vital to ensure ongoing effectiveness. Check for tears, punctures, or any signs of moisture accumulation, ensuring that your home remains dry and safe.
Signs of Damage or Failure
Common signs that your vapor barrier may be failing include mold growth, increased humidity levels, or water stains on walls or flooring. If you notice these signs, it’s crucial to reevaluate the condition and integrity of the barrier promptly.
When to Call a Professional
If you are unsure about the installation process or discover extensive damage in your crawl space, consider consulting a professional. They can provide expert advice and conduct a more comprehensive assessment to ensure your home remains protected from moisture damage.
Frequently Asked Questions
1. How thick should a vapor barrier be?
Commonly, a vapor barrier thickness of 6 to 20 mil is recommended for crawl spaces. Thicker materials offer better durability and resistance to tearing.
2. Can I install a vapor barrier myself?
Yes, DIY installation is possible if you follow the proper guidelines. Ensure you have the right tools and materials, and take safety precautions.
3. How long does a vapor barrier last?
With proper installation and maintenance, a vapor barrier can last upwards of 20 years. Regular inspections will help extend its lifespan.
4. Do I need a vapor barrier in my basement?
A vapor barrier is recommended in basement areas, especially those prone to high moisture levels, to prevent damage and improve indoor air quality.
5. What happens if my vapor barrier gets damaged?
Damage can lead to moisture infiltration, resulting in mold growth and structural issues. Regular inspections can help detect problems early.